February 16, 2011

TG4, Leaving Cert & Díospóireacht na gCeannairí


In ainneoin Gaeilge atá beagáinín rusty agus briste, beidh an blog (blag?) iomlán seo as Gaeilge in onóir díospóireacht TG ceathar anocht.

Táimse thar a bheith bródúil go bhfuil triúr cheannairí againn, a leabhairin dothain Ghaeilge le go bfheidfidís an díospóireacht seo a eagrú (i ndáirire, níl morán grá againn don triúr... Micheál ach ga h-áirithe... agus Enda... bias, moi?).


Tá súil agam go mbeidh seans acú labhairt faoina bpolasaí, agus nach mbeidh diaspóiracht again cosúil leis an gceann a bhí ar RTÉ... twitter debate, abair cibé rud is féidir i 45 soicind. Nach fíor gur na polatóirí fein a shocraigh go mbeadh 45 soicind an duine acú.. ná h'abair go bhfuil faitíos orthú go mbeadh an pobal ag iarradh a bpolasaí a scruidiú??!

Cé chomh íoranta (Béarlachas, I know!) atá sé go bhfuil Enda agus Fine Gael ag iarraidh breathnú ar an Ghaeilge mar teanga gan feidhm, is go raibh síod ag iarriadh í a bhaint den leaving cert, agus Enda le Gaeilge den scoth aige. Ta súil agam, i ndiadh an clár stairiúla seo, nach mbeidh siad ag iarriadh.

So, na deanagaí dearmad, VÓTA 2011, ar TG4 ag a 7 a chlog (Beidh mise ag breathnú ar 'Garraí Glas' ina dhiaidh).

December 20, 2010

MAKING THE MOST OF YOUR OFFICE/STUDIO-SPACE!

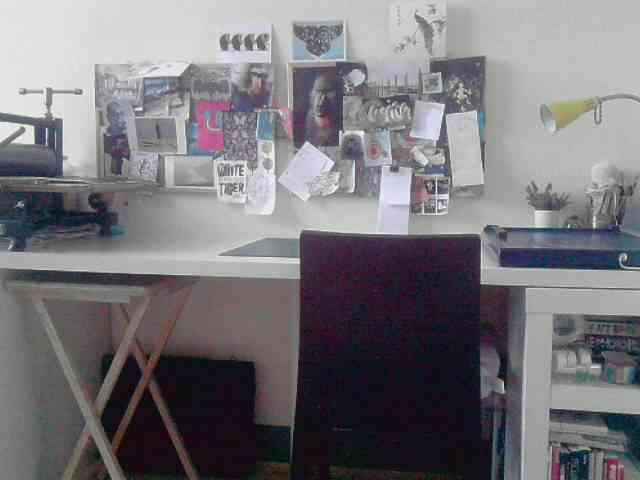
Last week I promised I'd use my next blog entry to talk about how to make the most out of a studio/ office-room with limited space (and budget). I had to make the recent move from my studio back home, and set about trying to create a good working space within a small single bedroom (which already housed a wardrobe & chest of drawers that couldn't be moved elsewhere).

Desk Area
The first thing to do is to consider what you will use the room for and to work from there. I know that sounds like a very basic requirement, but think about what space you need, and measure and plan and do a bit of research before committing to buy. Forget about what you've seen in magazines, or in furniture stores, the key is to make it work for you and your work. There's no point buying a big desk, only to find that you're mostly working on your laptop and the rest becomes a dumping ground. Storage should be a major consideration - think about what will work, what you need to hand, and what can be put out of reach. For example, I use a sturdy under-bed storage box on top of the wardrobe, as it fits perfectly, but keeps all my postage paraphenalia together and out of the way.


Inking-up desk tidied away
Printing Area
From my own experience, I knew I needed three things: clean desk area for drawing/ carving; area for my press and then an area for inking up. For the messy inking up area I decided to use a 'mobile' option, so I bought a cheap but fairly sturdy fold away table, covering it in PVC for the ink. It literally fits under the desk when not in use, or can be folded away at the end of the desk. As for the desk, I needed a long narrow space to work on and so decided to get storage options underneath the desk. one 'open' area for books and another set of drawers for hiding away inks, rollers, lino blocks and other bits. I think that's the key to making a space work for you. Having everything to hand and easily accessible is really important, but you don't have to look at it all the time. The drawers are perfect for that.

pots of pens etc
The desk is long enough to house my printer at one end; pots of stuff at the other and my guillotine; leg room and a 'desk' area; and space to house the inking table underneath. For the general desk-area, I've used tins of different sizes - great for my pegs and string and pens and pencils. It's a compact space, and I could do with more storage areas / shelves for paper and filing storage, but it works for the time being and until I return to an external studio. The desk (inc. drawers and shelving) was about €100 from Ikea. It is a bit of an investment, but this matched my specific needs. You might be able to grab an online/ live auction bargain - try to buy a desk because it works for you, not because you need a desk (you might not even need a desk at all!)


As I mentioned in my last blog entry, one of the things that works for me is to tidy at the end of the day and get the space ready for the next morning... mine is always this tidy... did I say always... I meant never.

December 11, 2010

About working from home

The Printing Rooms is now live - great news - have a look: www.theprintingrooms.com. During the period of going live I moved my studio to my spare room and there are definitely pros and cons. I thought I'd make this entry helpful for those of you who are working from home, and share my 'tips' and my moans about it... and, for anyone in the same boat, I would love to hear your secrets for a happy working life from home.

Firstly, the internet. Lovely lovely, helpful, informative, distracting internet. Whole days can be wasted away on the internet, so my tip is to turn it on first thing, check, update, research, and then switch it off - turning computers on and off is a pain, so you're less likely to be drawn to it. (I never stick to this rule...ever, so maybe this wasn't the best tip to start with..).

Tidying your space/desk - now this really does work for me. Even if I have spent a good 14 hour day working in my studio from home (which I have in the run up to the website going live), I will still spend a good chunk of time clearing and tidying my space before I hang up my rollers for the evening. I could easily waste a day cleaning the studio if I let myself, so doing it at the end of a day is a good motivator to get it done quickly and prepare for the next day. It also means there are no excuses the next morning. It's now so ingrained, it's become as much a part of my day as finding ways to avoid doing work!

Managing your time - lists. I have made lists that were entirely impossible to complete, but after a month or so of doing it regularly I now have a good system. At the end of each week, I will write out a list of tasks for the week, but  each evening/morning I will write out a list of tasks for the following/ that day. This way, I know exactly what needs to be done and when - I do switch around and re-write lists, so nothing is set in stone. The daily task list then has more focus on the exact requirements. For example, weekly task list might have: 'finish Heart plate', but the daily list for a Monday might say, 'draw plate, cut plate, test-print plate'. The more you put on the more you can cross off (Is that cheating? I've stopped short of writing 'get up, shower, have breakfast etc'...  only recently). (another good tip is to have a task list for a project, i.e. every single task that needs to be done towards completion, so that you can refer to that so you don't forget anything)

Managing your time, deadlines - Cons, tendency to put too much pressure on yourself. Pros, 24 hours in a day, 7 days in a week of being able to work at your own pace. Cons, 24 hours in a day, 7 days in a week to have no excuse not to work. As a home-worker you need to be self-motivated and organised, and you need to set yourself deadlines. The best approach is to be realistic. When I chose a date for the site to go live, it was all systems go, and at times it was touch and go about whether I'd get it done on time. It's often much easier to work towards someone else's deadline. When it's self-imposed it's easier to let yourself down.. so pick a deadline, and stick with it and don't let others talk you out of it.

Office-politics - there is none, hurray!

I'd love to hear any other tips out there. Next week's blog will be about setting up a home-studio with limited space and budget (I could just write it now in one sentence - Went to Ikea!)

November 21, 2010

OFFICIAL COUNTDOWN TO WEBSITE OPENING

So, a date's been decided on, and it's all systems go. The official date of The Printing Room going live is Friday, 3rd December, so bookmark this page now: http://www.theprintingrooms.com/


Currently, preparing the final plates for printing. There are another 12 editions to print, so it will be touch and go whether there's enough time to get every single edition up on the site, but if not on the 3rd, they'll be there over that weekend. Each edition takes the best part of a day to print, but with the website to finish and the site images to photograph, and the mounts to order, and the postage to sort, and..... well, you get the picture, 8/10 days per week would be good at this stage!


No The Printing Room images this week! I will be keeping you all in suspense for the website opening, and so all editions will be hush-hush from now. Speaking of images, am preparing and buying frames, and will be setting aside a day and a friend pre-site/pre 3rd December to show you how your limited edition print will look framed... fantastic... obviously!!


Today: blogging, carving, cutting, printing, website-making. So much for Sunday being a rest-day. Right, enough of the chat, here's some pictures I've found that have helped the creativity flow this week, enjoy!

November 14, 2010

SOME INSPIRATIONAL PICS!


part of my current noticeboard!
This week, I'll keep the writing short and show you some images that I have in my studio. I always have a very large notice board in front of my desk which I add to and change every few weeks, sometimes daily if I have lots of images to get through. I use image sources from the internet, magazines, art galleries, books (some great illustrators out there), greeting cards, wallpaper etc. You may notice a common theme... nature and animals... sometimes, when all inspiration is lost, it's nature I turn to... and even when all is won I still turn to nature.


I really love the depth and creativity of 1950's naive pattern. You can really see the influence of screen printing and over-laying in this type of pattern. 


1950s influence, geometric
And the best part is that it was that there were variations that all made sense together. So we had the rough around the edges, over-laying. We had the geometric shapes and we had child-like/simplistic/pared down design... and the start of great cartoons!
It was all a direct influence of the preceding history, and designers and artists really went for it (and musicians, and architects...). 


When you look at anything from the 1950's you really do see the influence of current-day design, especially higher end stuff - just look at some of Tom Dixon's designs - this table is like a modern, even more pared down version of Ercol.

I'll happily finish off with some more images. You'll see the geometric, the child-like/cartoon and some animals pics... Enjoy! and if anyone has any images, similar or otherwise that they find a source of inspiration, then comment away!


1950's influence - geometric shape
1950's cartoon-style

Kool Cats!
Geometric


November 7, 2010

SOME LINO-PRINTING TECHNIQUES

During Lino Turorial 1 and Lino Tutorial 2 we briefly touched on the types of different carving you can use with lino-cutting. I'm going to expand a little on that in this blog entry and show some examples of the differences you can achieve - these will be the prints you will expect to see for sale on www.theprintingrooms.com once the site is up and running (just a little plug today!).

Firstly, when you draw your image onto the lino, you can either carve that image away, or you can carve around the image. The difference, ultimately is the amount of ink that will be transferred onto the paper once you have reached the inking-up stage. The difference in the final print can be huge, however.

When you carve away the drawing only, you will be leaving a much bigger area of the plate on which to hold the ink, giving a much larger 'background' area - we really favour this approach, as rather then getting caught up in the carving away of a large space, what you can achieve is a really free and energetic drawing. If we take the 'Flamingo' as an example, the outline was drawn onto the lino-plate first, and then we worked back into the plate with smaller amounts of detail - as this wasn't drawn in, it meant that each cut was done in quite an energetic manner, and we think this comes across in the end product. To have the larger ink area in the colour that we mixed also gives quite a nice shock of colour!


Now to focus on the 2nd technique that we have mentioned. For the 'Jungle' Series, we have carved around the image, and so there is a very different quality achieved. The image we have chosen is 'Elephant Stack'. Again, the outlines were drawn onto the lino-plate, but instead of carving the outline, we worked into the background and carved away anything that wasn't drawn on the plate, therefore leaving quite a bit of background on view. It is a much more work-intensive approach, but the end-product defines this. For the 'Jungle' series, we wanted a much more naive approach and look and we think that this was achieved. There are other techniques that can be used for lino, for example it can be etched - Keep watching our blog for new entries!